Make Your Icons Shine with Offset Paths and Add Anchor Points
My main objective with this blog is to create meaningful tutorials and knowledge about the tools and techniques that I use every day when I am inside of Illustrator. This post is no different as today I'll be talking about Offset Paths and Add Anchor Points, two little known features tucked away in the menus of Illustrator.
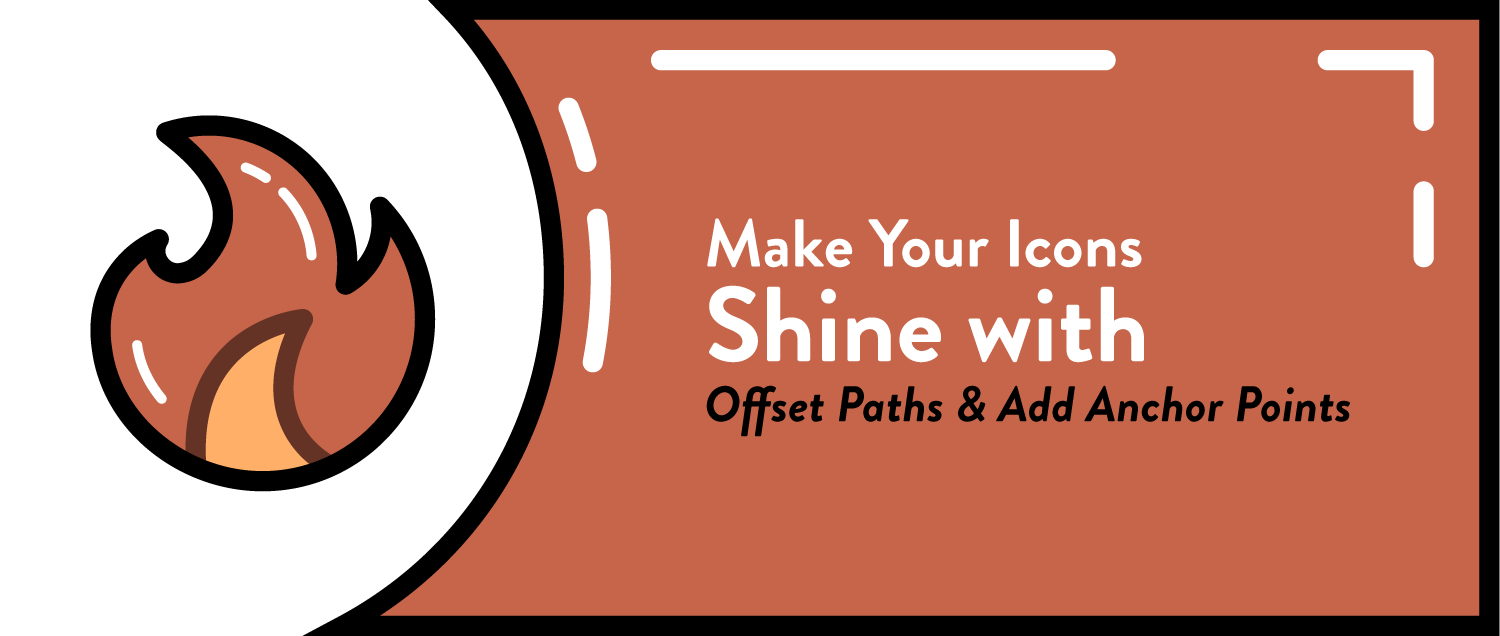
One thing I like to do when I'm refining and adding details to icons is to add a reflection or a shine to an object. For example, the white lines in these icons I made recently:
Although they are simple, and easily created, these reflections do a great job of adding a little bit of extra detail that can really make your icons and illustrations pop.
Offset Paths
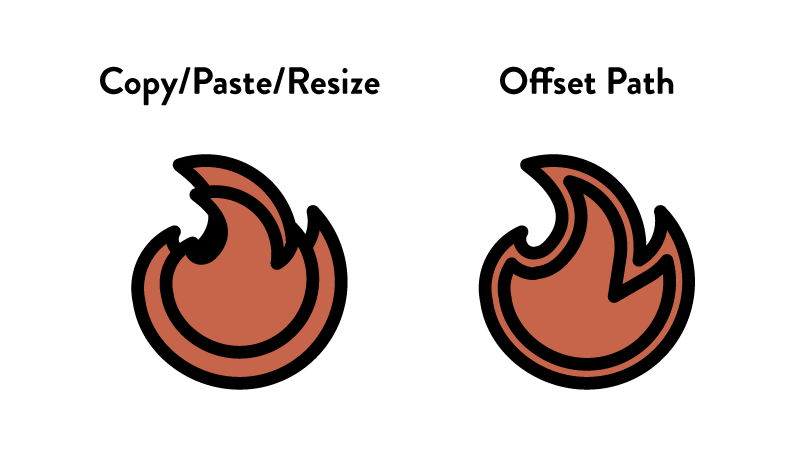
I really like the Offset Paths feature because it is extremely precise, and can ease some frustrations of trying to do this manually, or by copying/pasting, and resizing an image. Resizing can give you some odd results. Let me show you what I mean using the fire from the campfire icon above.
As you can see from the example on the left, this just won't work! Using Offset Path gives you a much cleaner result that you can actually work with.
To use this feature, select the object that you are trying to duplicate, and navigate to Object > Path > Offset Path.
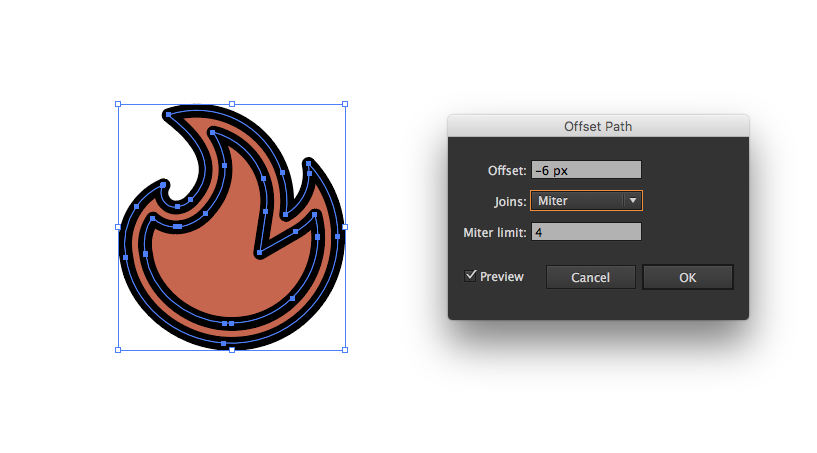
This brings up a dialog box that lets you refine how you want the path to be offset.
Offset: The first option is the offset. A negative number will offset the path inside of the shape. A positive number will go outside of the shape, as you can see here:
Positive values go outside of the shape.
Negative values go inside the shape.
Joins: The next option is how the paths will join. There are three choices, miter, rounded, or bevel. You can really see this displayed in the highlighted portion of the image below:
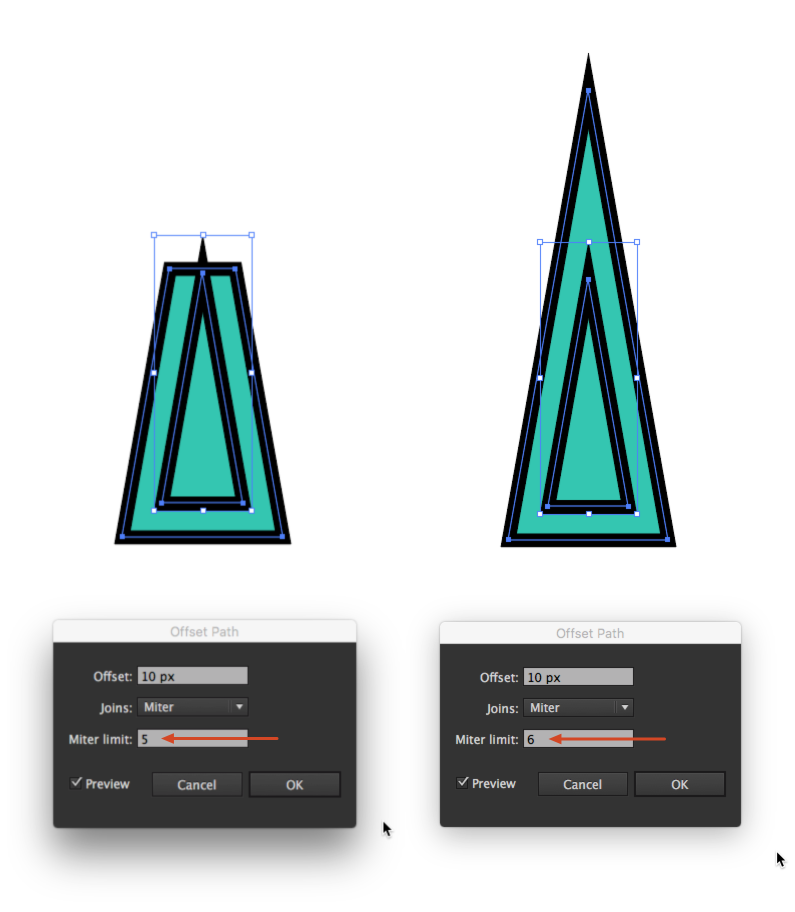
Miter Limit: Miter is a fancy word for pointed. This value represents the...point... at which your icon will get beveled off. You can't really see it in this fire icon, so let's take a look at an example of this with a sharp triangle.
The miter limit all depends on how acute your angle is, and the size of the object.
Add Anchor Points
The next step is to delete some parts of the offset path to create the effect we're looking for. First we want to add some anchor points, so we're not deleting too much of the offset path. You could do this using the Add Anchor Point Tool (+), but I find that process is too manual and is not very precise. For that reason, we're going to use Add Anchor Points, located in the same place as the Offset Path tool.
Add Anchor Points will add anchor points in between each of the current points that are in your shape. Essentially, this doubles how many anchor points you have each time you use this command. For example:
To create this effect, select the shape that was created from the Offset Path command, and navigate to Object > Paths > Add Anchor Points. I recommend doing this two or three times to make it easy to delete smaller portions of your path.
Once you've added a bunch of points to your path, use your Direct Selection Tool (A) to select and delete portions of the path. Like this:
The last step is to change the color of the inner paths to white, and you're all done!
With everything in Illustrator, there are many ways that you can utilize these features. For example, try using Offset Path to create some interesting effects with text!
Are there any features you find frustrating or intriguing that you're interested in learning about? I want to create as much value for you as possible through this blog, so let me know in the comments below, or you can always reach me via email at grantmfisher@gmail.com!
Thanks!

